
Customization
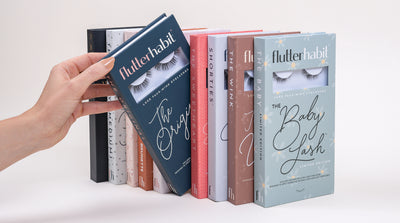
When it comes to lash extensions, there truly is no one-size-fits-all. From different eye shapes and sizes to different personal styles, it’s important to find a lash that suits your needs and checks all the boxes. Enter, FlutterHabit. Our 10-day wear, DIY lashes come in a variety of styles that were created for an out-of-the-box look with easy customization. Today, we’ll discuss a few tried and true ways you can customize your lashes to get the best results and a look that brings out your “best you!”
Start with your segments
All of our styles come with at least 4 segments, to ensure full coverage across a variety of eye shapes and sizes. However, you may find that your eye doesn’t require all four segments for full lash coverage. Mapping out your eye with your segments before applying glue will allow you to plan ahead for your desired results and determine whether or not you need to make additional adjustments to the individual segments for an improved fit or reduce the number of segments that you use in one application.
As you place your segments, you might find that you like switching the order of the segments to create a more doll-eyed or cat-eyed result. The opportunities are truly limitless. Take the time to play with your segments with each new style you try to discover the best application method for your personal preference.
Cut and Customize
Once you’ve decided on placement and quantity of segments, you can further customize your lashes by making cuts to middle segments for better placement. If you’d like to use all of your segments but just make them each smaller, you can trim the ends off of every segment. Or, you can make a larger cut to remove the end of any individual segment.
Another option for cuts that can help you customize your lashes might be to cut middle segments in half to help them better adhere and lay along the curve of the lashline more seamlessly. Additionally, you can cut the outermost or innermost segment in half as needed to prevent poking at the corners of the eye due to oversized segments.
Speed Sets
For those who want an even simpler application process, or for those with smaller eyes, consider doing a “speed set” which consists of using just three lash segments per eye. This removes the need for trimming and takes additional time off your application process. Depending on the style you choose, you can select different segments for your desired finished look.
As a general rule, applying two outer segments and the innermost segment will result in a doll-eye look, while applying two middle segments and the innermost segment will give you more of a cat-eyed result.
Altering
Last but not least, to further customize your final lash look consider “altering” your segments by applying them in a different order than they are placed in the tray. Doing this generally creates a new shape, offering you some variety in your lash styles while sticking with a lash length and curl that you love.
One example of the altering method is:
Turn a cat eye into a doll eye by taking the outermost corner segment and using it in the inner corner of the opposite eye.
Don’t Waste Segments
As a closing tip, make sure to hold on to your extra lash segments if you have leftovers! These can be used together to create new sets ensuring that you get the most out of each box and have the opportunity to create a personalized lash look. Remember to use the above tips as needed to achieve your desired shape and don’t forget to take notes for yourself if you come up with a new application order that you love.
Ready to give lash customization a try? Order here and be sure to tag us in your finished look!